How To Make A Poster
October 24, 2012 - SFM Team
Today we added images to the steam community hub for the SFM. You can now share your images directly from the file menu!
To celebrate, we thought we would show you how we make wallpapers and posters using the SFM. We've found that once you get the hang of using light and shadow with a 3D scene, it can really feel like you're painting with light.
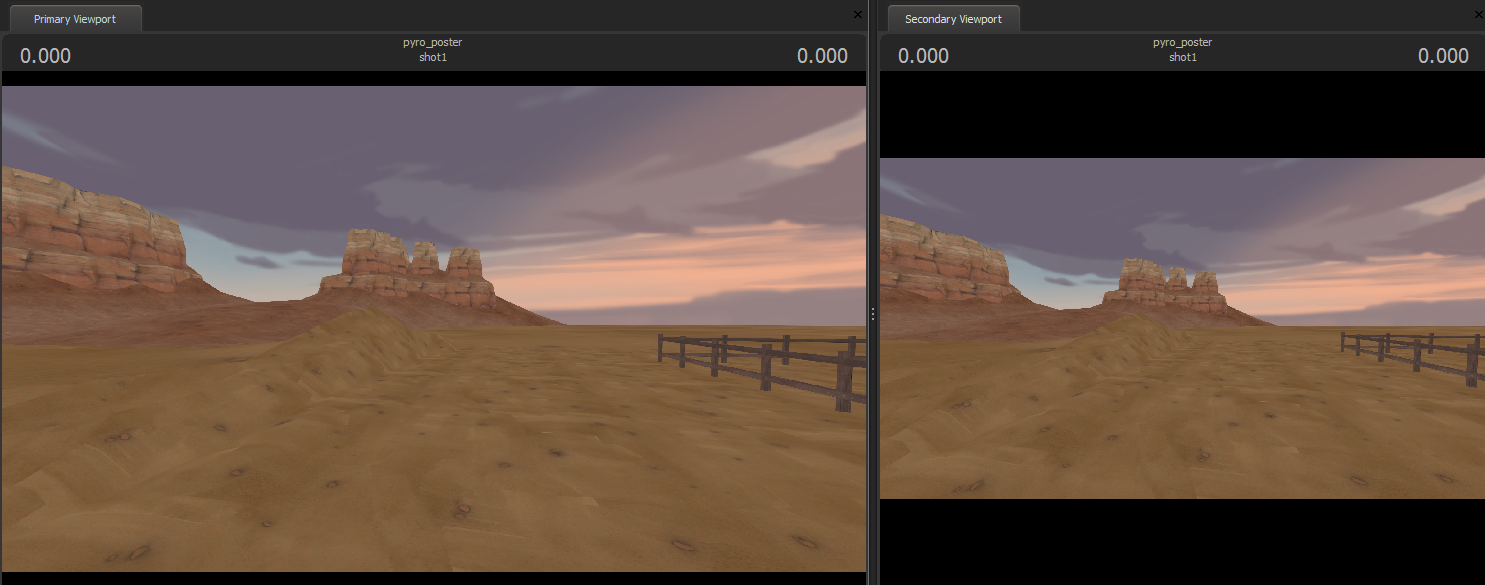
To get started we loaded up a simple map that was created for "Meet the Pyro". Since the map was dark, we disabled all lighting in the viewport so we can see better and just focus on the layout. Since we know the camera will eventually be shooting a 3D scene, we place it quickly and avoid refining the framing.
Next we bring in the Pyro and one of the building models that we made for the background in "Meet the Pyro".
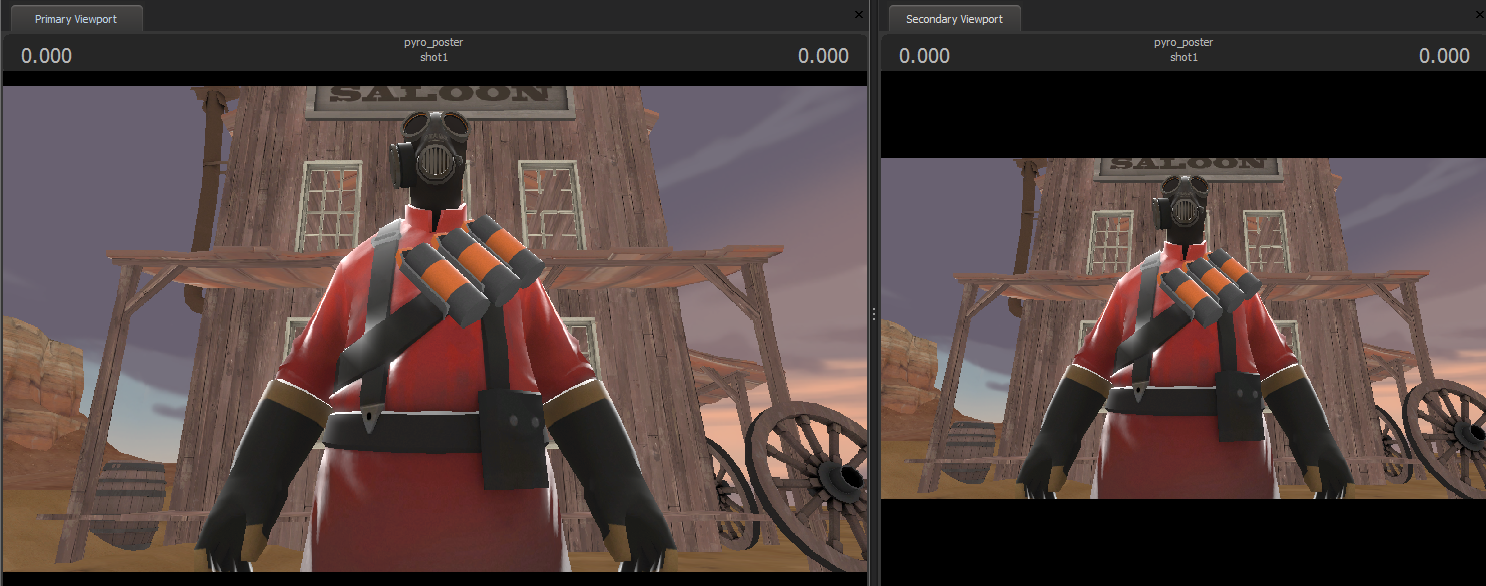
Now, using the work camera and the translate manipulator we position the Pyro in a good spot.
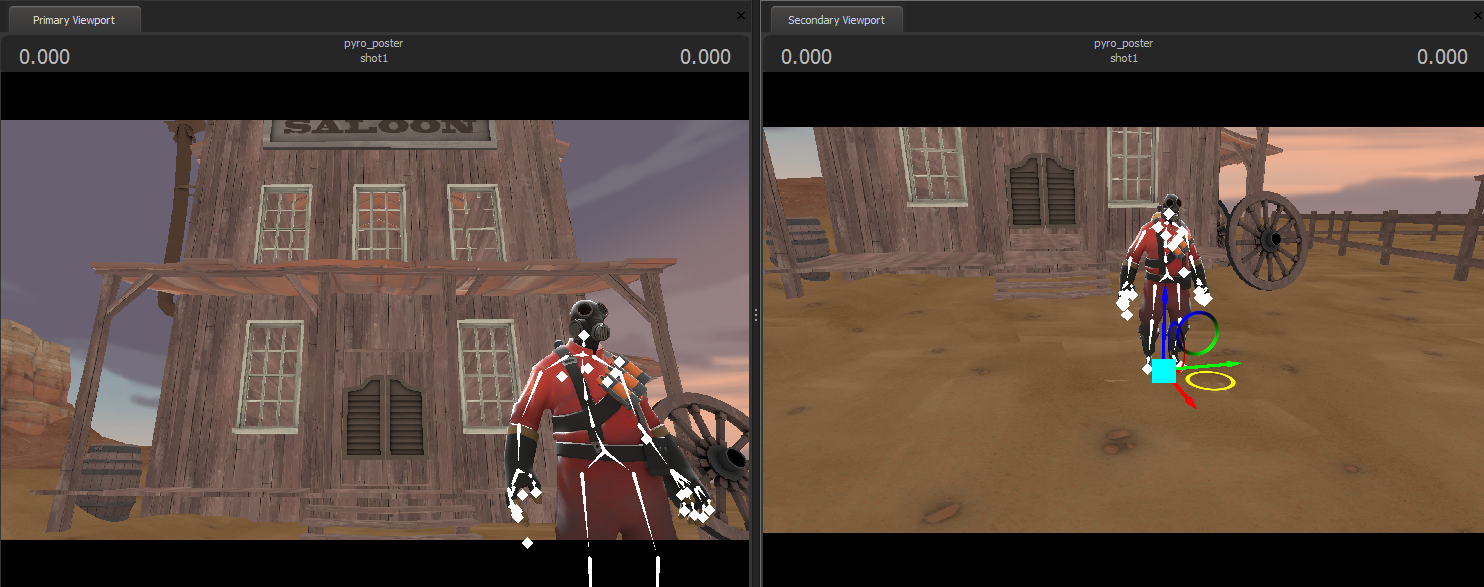
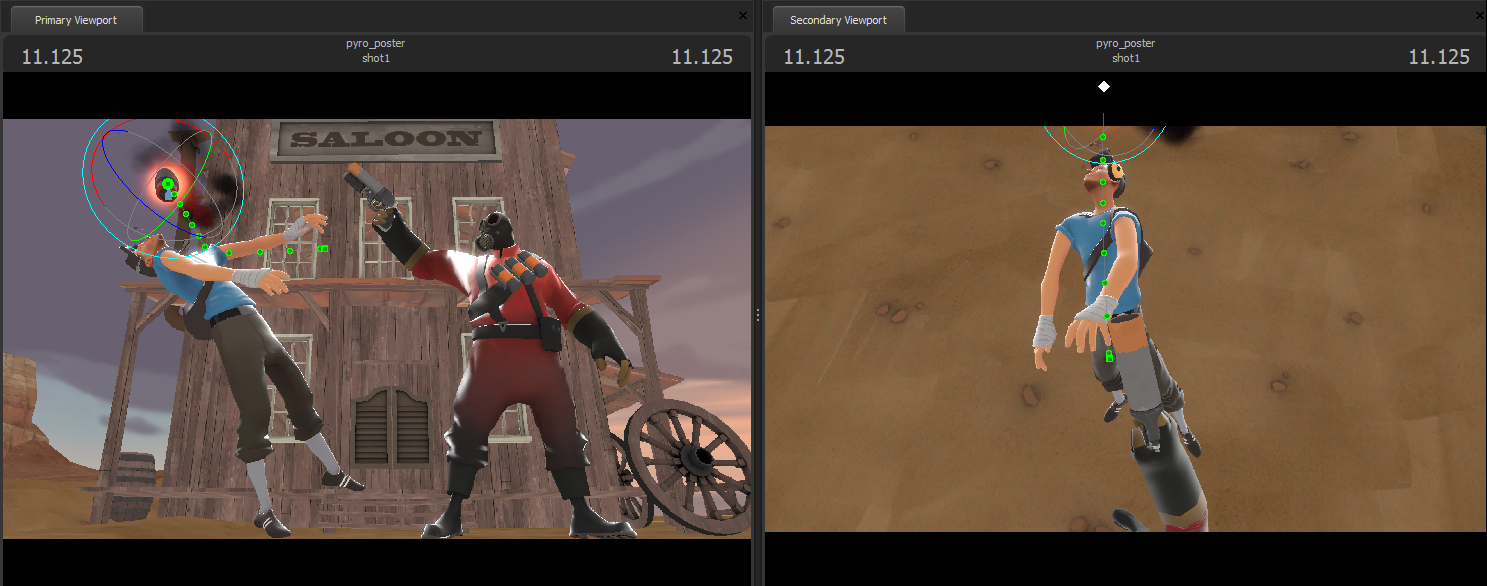
Next, we frame the camera and start rotating the bones, working out from the pelvis. We never translate any of the bones except for the pelvis and the root, otherwise the model will look broken.

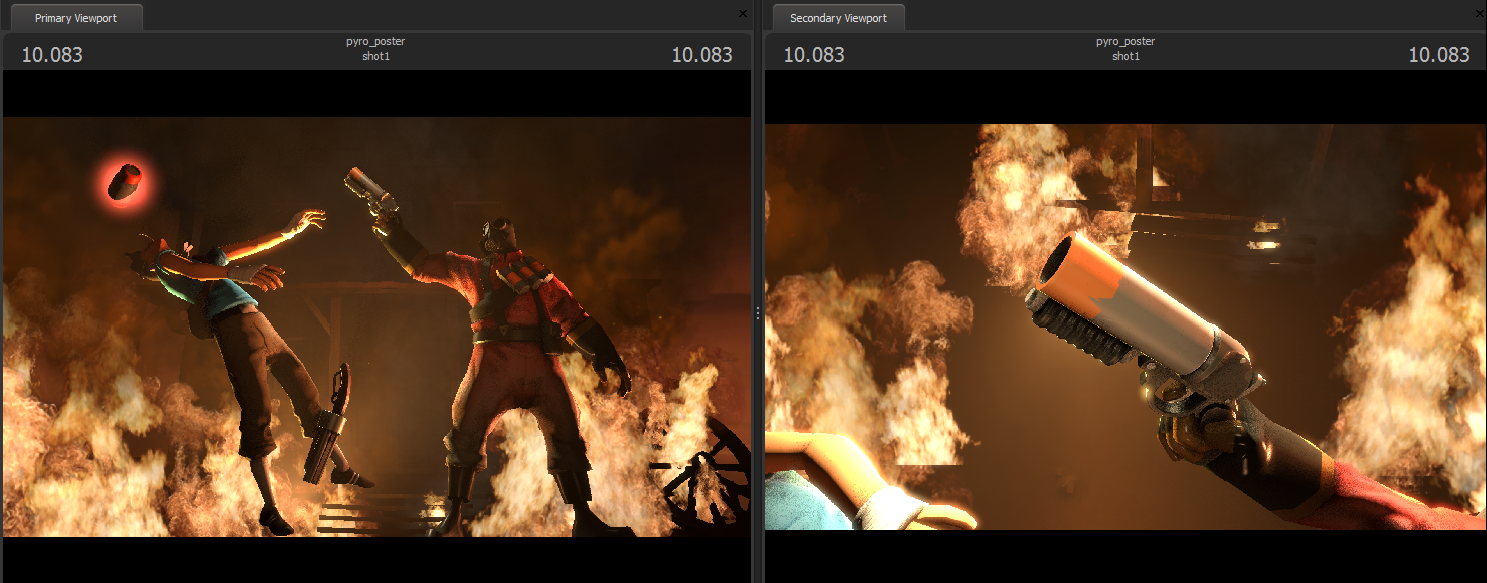
We keep refining and adjusting the pose until it starts to feel like what we're going for. We bring in the new community weapon, scorch shot, and place it in the Pyro's hand. We use the rotation manipulator in local rotate mode to curl the fingers around the gun.

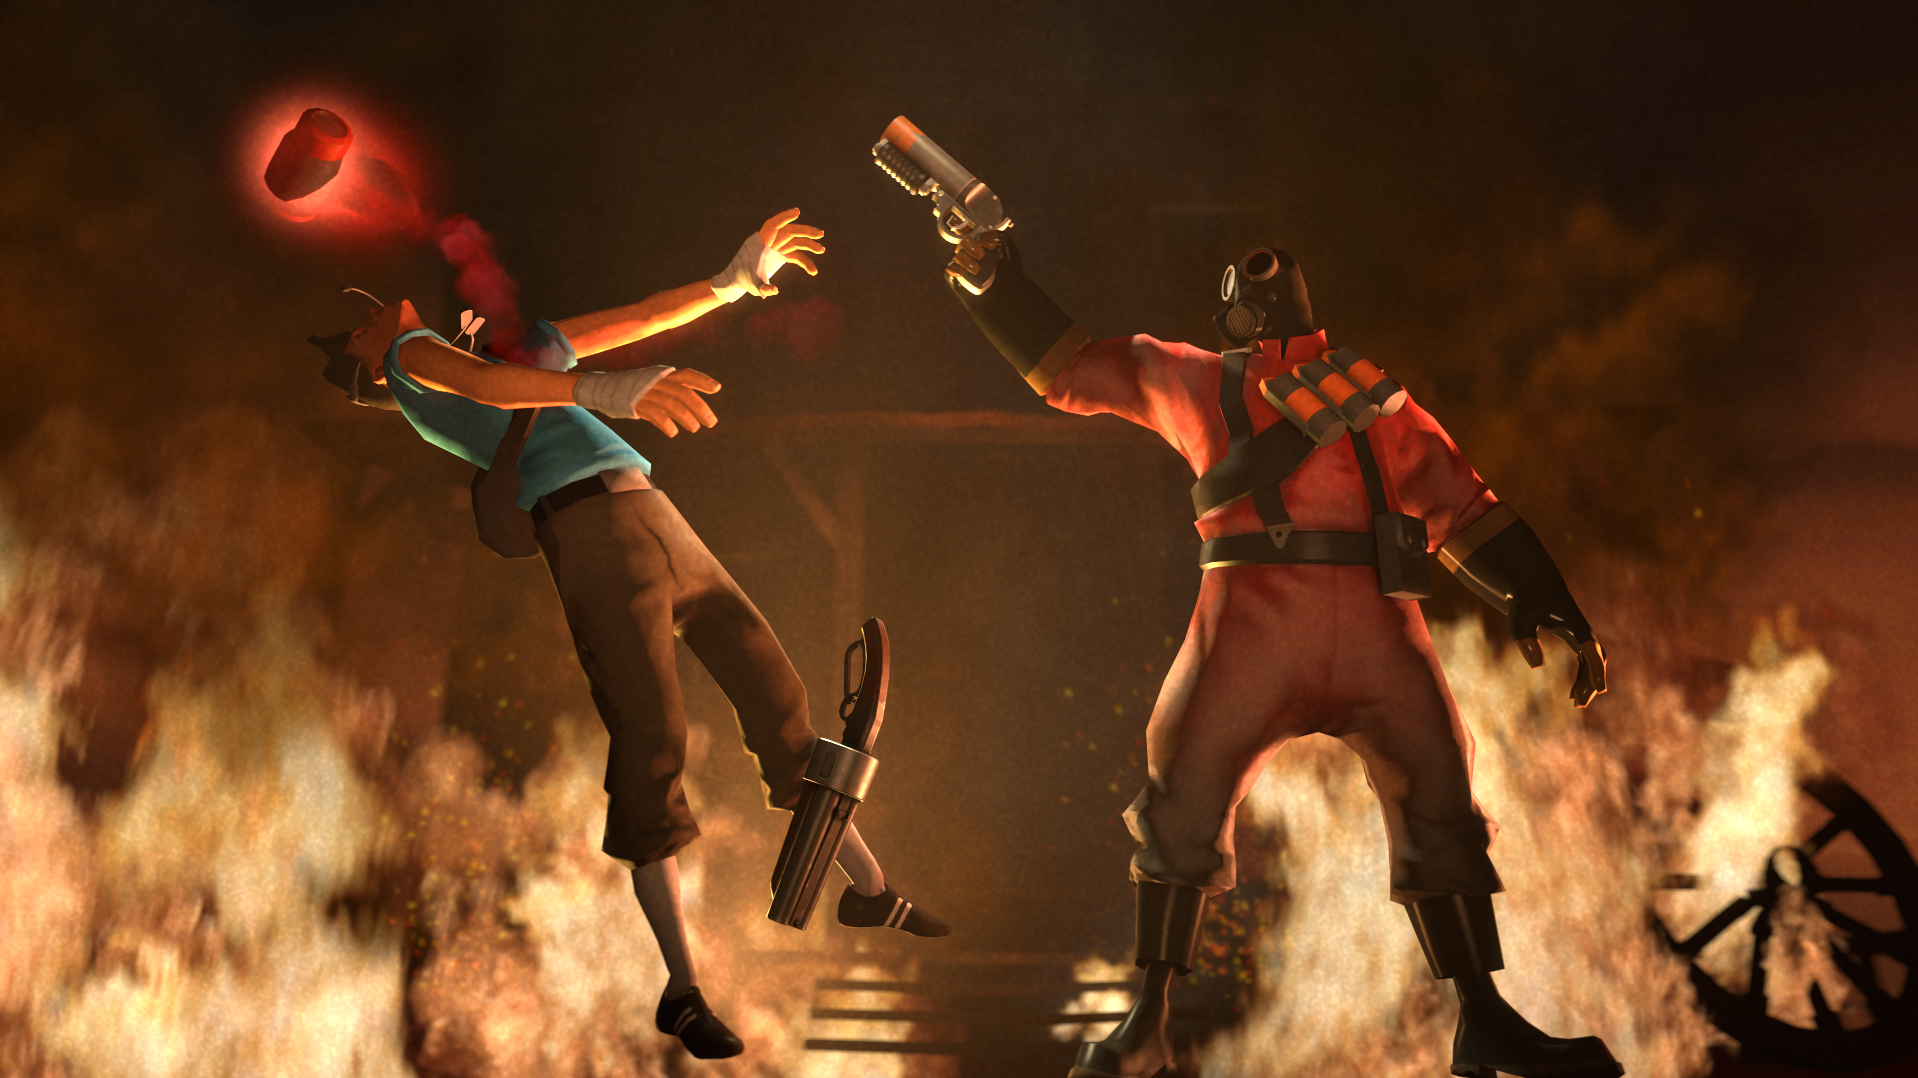
Time to add the scout and put him in place so he looks like he just got hit by the flare. Just like we did with Pyro, we rotate each bone until the he is in a good mid air pose. Next we bring in the flare bullet and animate it so that the particles will create the smoke trail properly.
Now it's time to add some lights. We enable lighting again, but everything is dark because of where our scene is situated in the map. This was intentional because we wanted to only light with SFM spotlights. We also decided to paint a quick sky plane and place it behind the scene.
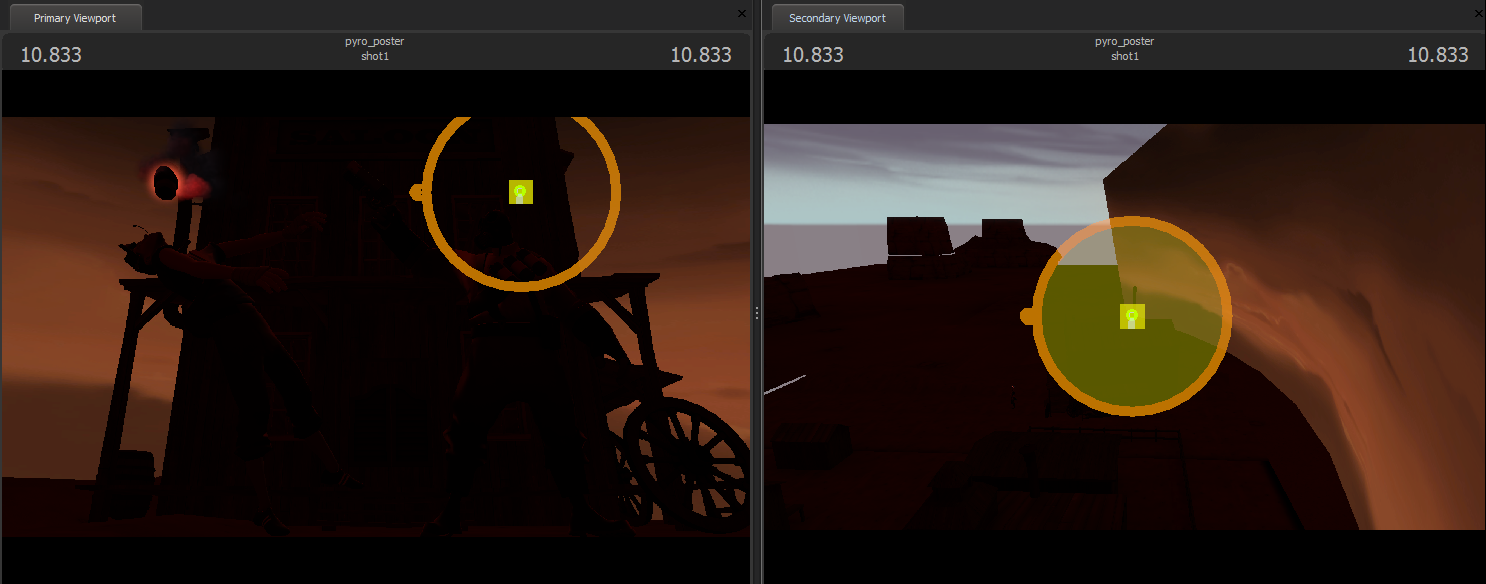
Next we add in the first spotlight to be the key light.
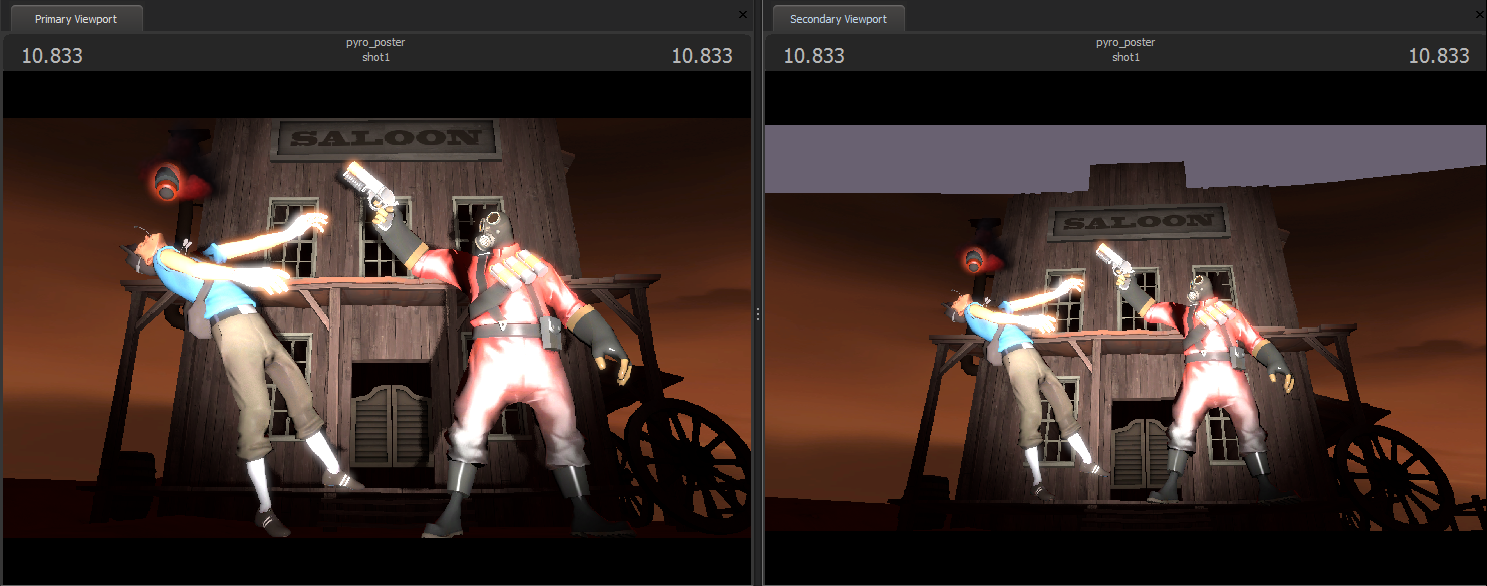
We color the key light to be close to the background color and add a few rim lights. Adding a volumetric light in the background helps create some depth and atmosphere.
Time to add the flame and fire particles, the Scouts scattergun, and a fill light for the Scorch Shot.
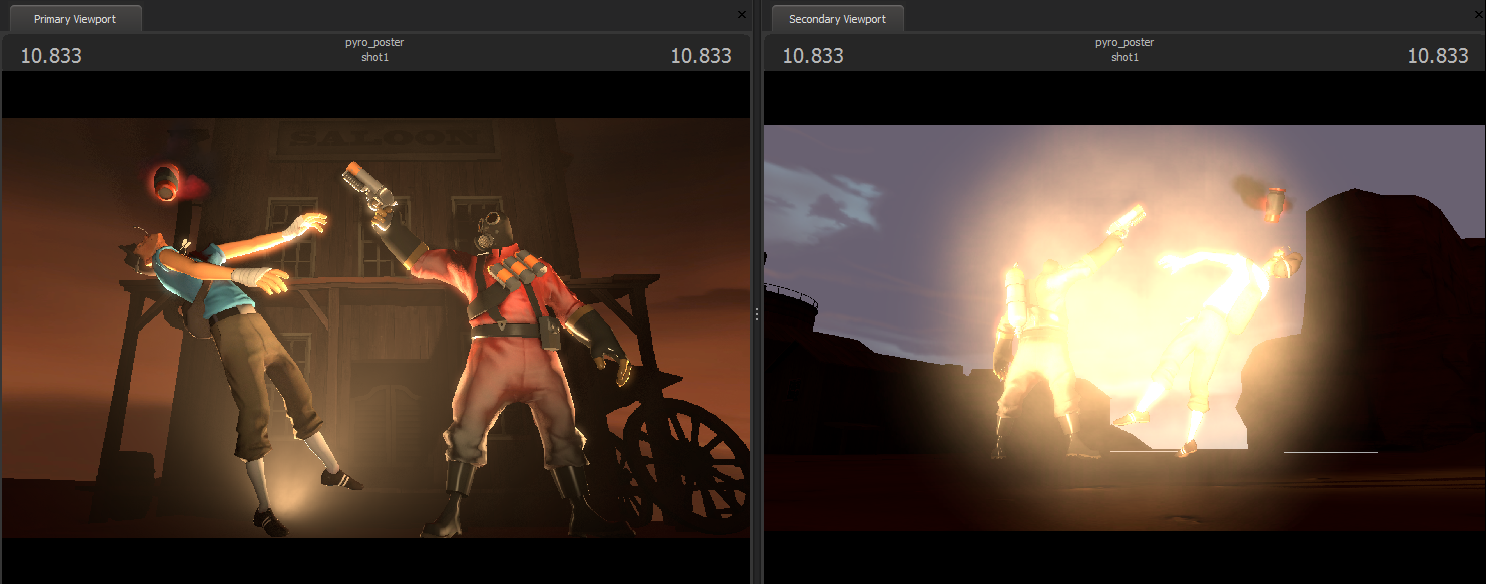
Now that we have the rough lighting setup, we tune the poses and refine the rim lights a bit more.

Add in some grain, vignetting and a slight color correction we're ready to export the image as a poster.
To share the image, use the File>Sharing menu, and choose "Publish Image to Steam" and the image will be added to the SFM community Hub.
Here's the timelapse of this poster getting created from scratch.
Btw, this was created using a prototype feature of the SFM called screencast that automatically creates a timelapse while you work. You can turn it on under the help menu.
Get Steam here.
The SFM Blog
Here we'll be sharing news, tips and tricks about all things relating to our storytelling tool, the Source Filmmaker. Because it�s the tool we use here at Valve to create our own movies, we will be adding features as we need them and then sharing them with everyone through Steam. You can join our official Steam Group to stay up-to-date with all the latest SFM news.
Contact the SFM Team at: sfmteam@valvesoftware.com
Submit bugs at: sfmbugs@valvesoftware.com
Work at Valve:
valvesoftware.com/jobs